I wanted some boxes to sit in my Billy bookcases and hold my DVD collections on their end, making it easy to pull out and see if I wanted, but otherwise less noticeable.
Materials
- I used a 4’x8’ plywood sheet (12mm non-structural) - you could do this with a 1200x600 piece.
- Wood Glue
- Nails (having a nailgun makes this fast to build)
Making the box
Cutting Things Up
- Cut 3x200mm wide pieces, along the width of the sheet. ie, you want pieces 1200x200, not 2400x200. 😆
- If you’re using a big sheet, measure each time - remembering the kerf will take a little bit.
- Small sheet? just cut it in thirds.
- Stack two of the slices up, clamp them together so they’re all aligned and cut two pieces 710mm long for the sides.
- Mark the other piece to match the length of the sides, then deduct two thicknesses of board off that length and then cut there - that’s your bottom.
- The “ends” overlap the bottom, so they grip it from the sides (and the nails help).
- Since it’s the same width, the offcut can be cut down to make the “short” sides to the height you need - it should be 200mm, but match it up since we’re not robots.
Assembly
- Lie the bottom piece with a long edge facing up, then glue + nail a “short” piece to one end, to make an L shape.
- The reason I don’t do it with the bottom laying flat is it’s really hard to get the alignment right, the nails in and the glue from dripping on the bench.
- To help hold the pieces upright, you can just attach clamps on the non-working end at bench-level, which is enough to provide support.
- Glue + nail a “long” side on top of that, starting in the corner of the L and working out.
- Glue + nail the extra “short” end.
- Glue + nail the other “long” side.
At this point the box structure’s done!
Adding Handles
- Cut a ~260mm long piece of cord/rope/whatever and seal the ends so they don’t fray.
- Drill two 5mm holes about 100mm apart, wherever you want the handle.
- I put a handle on the long side to allow you to pull it out of the bookcase, so they’re ~300mm from each end, and 30mm from the top edge.
- Tie a knot in one end of the cord and feed it through one of the holes from the inside, then back into the other one from the outside.
- Tie a knot in the end of the cord and pull test it a bunch of times to check your work.
That’s it, you’re done! One day I’ll chuck some stain or varnish or something on them, but not today!
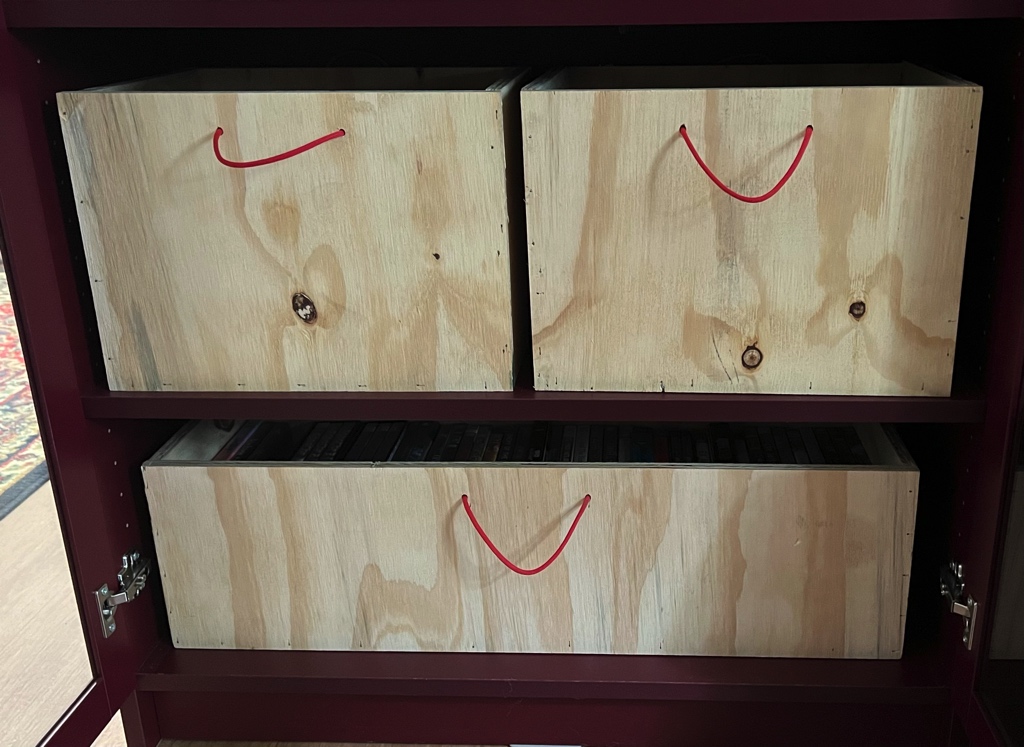
The bottom one is as described, the others are slightly different shapes.