Ford Falcons and their associated other models in the AU, BA and BF range share a central locking system that has an actuator that has a little bit of a flaw. If you hit the lock/unlock button when it’s already in the state you’re asking for, this can happen:
Once that happens, your car’s insecure, just making a weird grunting noise when you hit the button to lock it.
First things first, take the door trim off and undo the bolts that surround the lock latch on the end of the door.
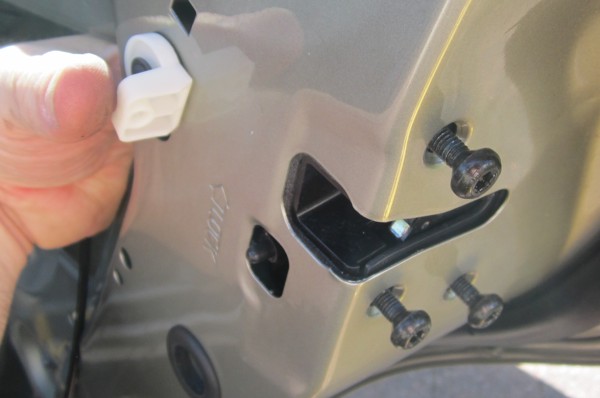
Once you’ve done that, you have to disconnect the lever that connects the outside door handle with the locking system. There’s a little black locking lever that you push down on, and it releases from the rod allowing it to be removed.
 AU Fairmont Central Locking Door Handle Lever
 AU Falcon Outer Handle Lever Unlocked
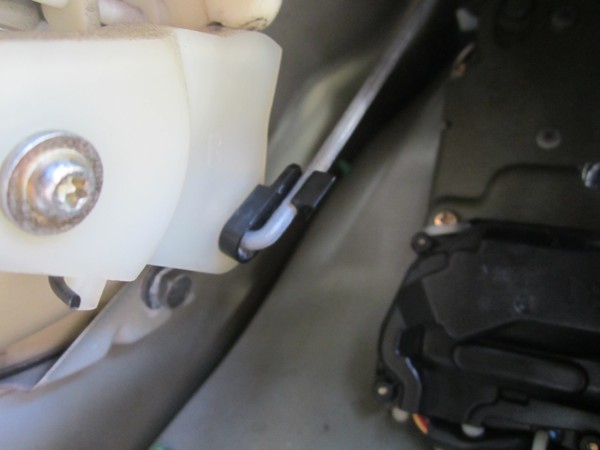
Once you’ve done that, you’re ready to remove the locking mechanism. Remember to unclip the power connection… press the locking clip and it’ll disconnect.
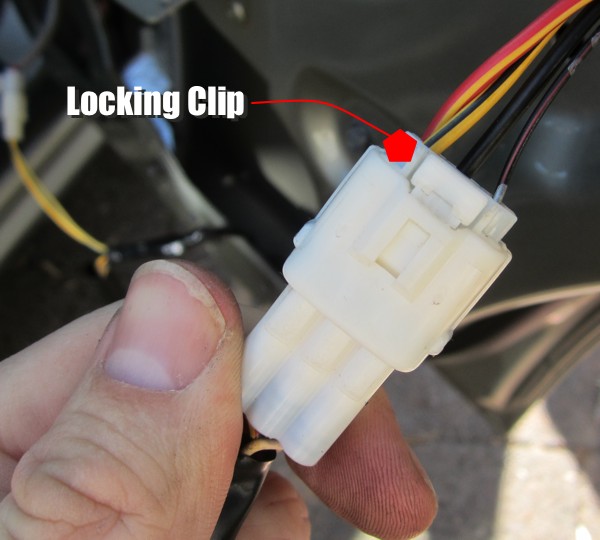 AU Central Locking Wiring Plug
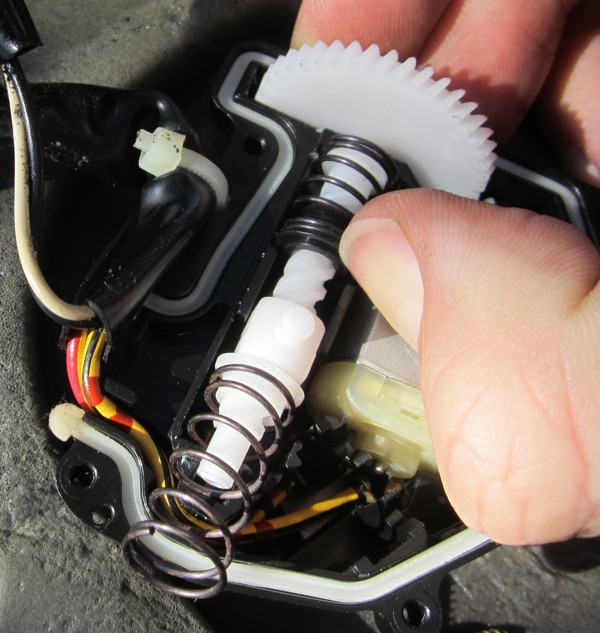
Now it’s time to disassemble the locking actuator. There’s four screws to remove to expose the mechanism.
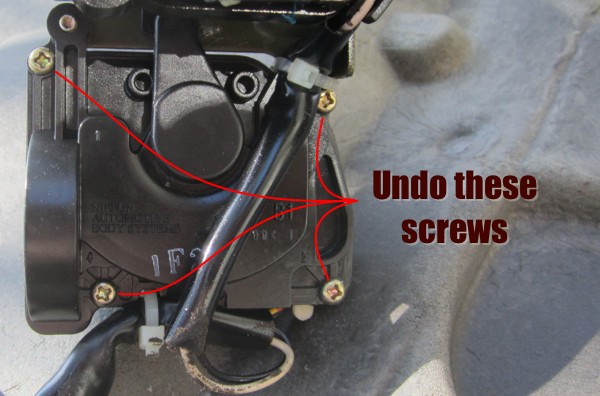 AU Lock Actuator Disassembly
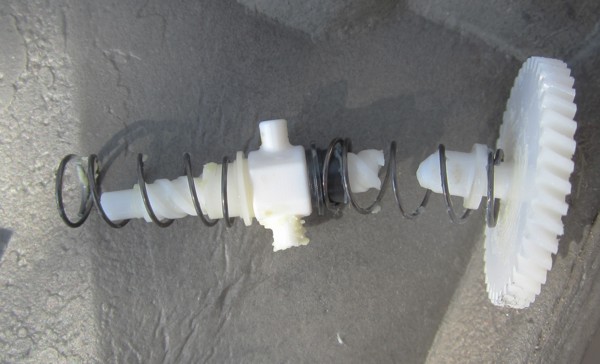
With a little wiggle, the actuator will open up like a happy clam.
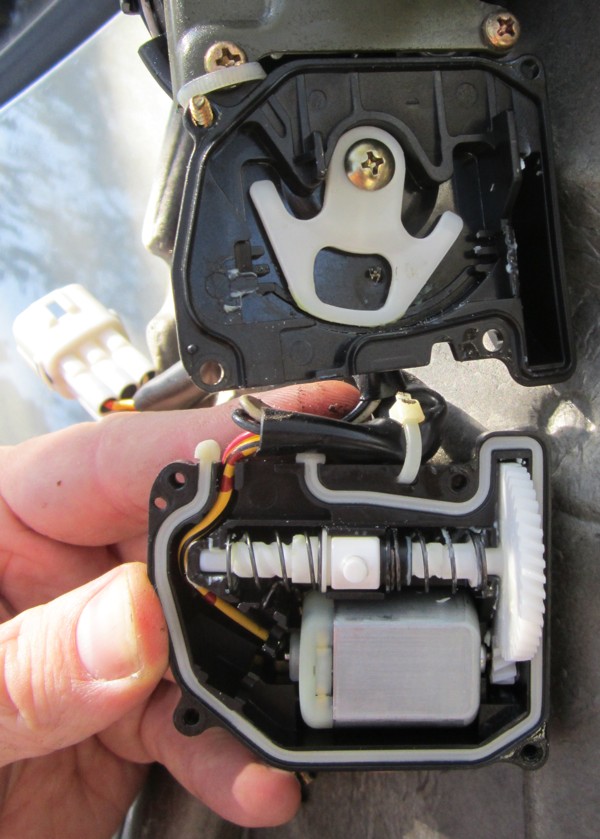 AU Falcon Central Locking Actuator Disassembled
The top half is the lock, the bottom half is the actuator. There’s a couple of places this module can fail. In my particular unit, the shaft of the cog snapped in half.
Other ways to break:
- The arms of the sliding block which pushes the lock can shear
- The teeth on either cog can strip off
- The motor can burn out
While I had it apart, I decided to swap out the motor I had with a new one that came in the refurbishment kit. Rather than having to solder parts, the pins just push into the motor. Pull gently on the brass pins, there might be a small amount of corrosion that could make them bind up.
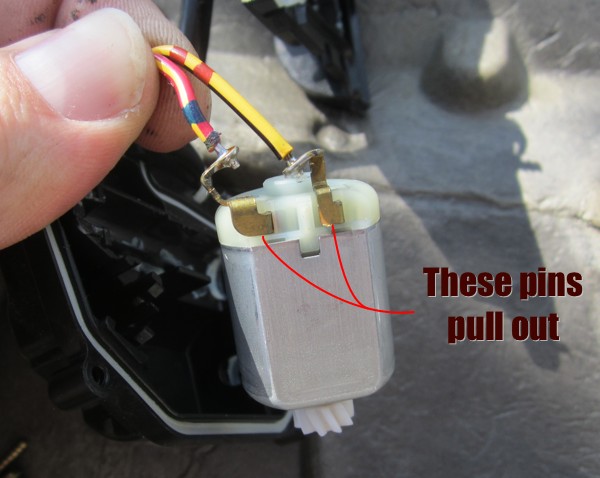 AU Falcon Central Locking Actuator Motor
When you’re reassembling the actuator, it takes a little bit of trickery. I found if you put the first spring on, then the little black spacer, then the moving block, you can use the block to hold the spring in place. You’ll have to hold the other end of the spring away from the large cog so that it’ll fit into the main housing of the actuator.
 Holding the Spring
Make sure the parts are all sitting in properly, referring to the previous pictures if need be. There’s some spots you might be able to locate parts that make it so it won’t go back together properly, but you’ll find them easily enough 🙂
Screw it back together, ensuring that it’s closed up ok.
BEFORE you screw it back into the door, plug in the power connector and test the function of the lock. No point spending time on it that you don’t have to!
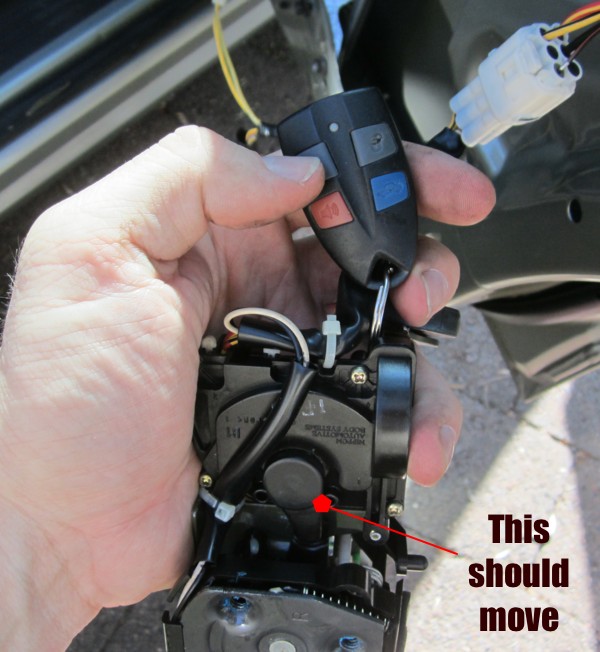 Test Before Installation
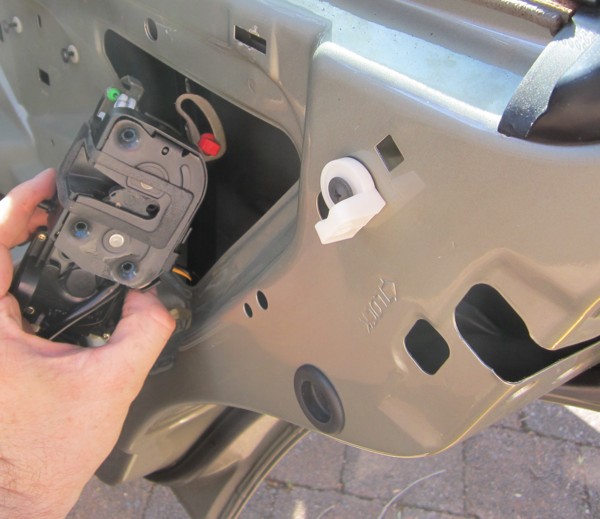 AU Falcon Door Latch Reinsertion
Reinstall the whole unit. the latch will face its intended destination as you put it in, and it has to go under some of the other parts before it gets there. The actuator faces down when it’s done.
Screw the main mounting bolts back in, and using a screwdriver instead of the door pin, test the function of the lock and the interior handle. Just push the screwdriver past the “mouth” of the latch and you’ll see it spin and lock shut. Pulling the interior door handle should release it.
Once you’re sure that works, reattach the lever for the exterior door and test it again.
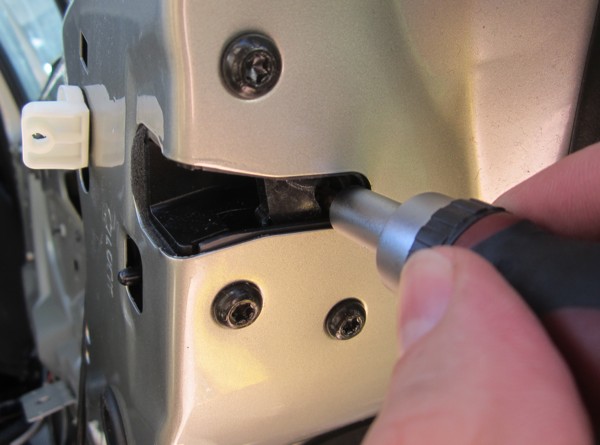 AU Falcon Door Latch Mechanism Testing
You should be all done now! Test it with the door frame, closing the door and checking function with locking and unlocking and both handles. If that checks out, reinstall the door card and have a well deserved beer.
If you’re looking for the spare parts, I got them from the ebay store called “gasstrustore“. I have no affiliation with them, but ordered once for the kit I used in this how-to and bought another two when I realised how easy this was 🙂
If there’s any questions or suggestions you can make, please leave a comment and I’ll see what I can do! I hope you enjoyed this article.