Thanks to bigkahuna on the Fritzbox forums (edit 30/4/16: now defunct) I found a working configuration to get OSX clients connecting to a Fritz!Box 7390 router’s VPN.
Before you start
Setup a dynamic hostname of some sort, this makes it so you don’t have to keep working out what IP you connect to. Dyndns.org is a good supplier. Configuring that is outside the scope of this article, but from my experience it’s been just a case of enter the details and it works.
The configuration file
USE SPACES NOT TABS
This caused me endless headaches, since it’s not mentioned anywhere else.
Thanks to bigkahuna on the Fritzbox forums (edit 30/4/16: now defunct) I found a working configuration to get OSX clients connecting to a Fritz!Box 7390 router’s VPN.
Where you see:
- XXX.XXX.XXX.XXX - change this to the IP address you want the device to have in your network. (eg 10.90.11.201)
- YYYYYY is the Group Name you enter when setting up your IPSEC on your device (just use your email address)
- ZZZZZZ is the Pre-Shared Key when setting up IPSEC - make it long and complex
- AAA is the username for login
- BBB is the login password - the device will ask for this every time a connection is attempted.
- CCC is the name the Fritz displays for the connection in your Fritz!box - it can be anything.
- You will also need to enter the dyndns name when you configure the IPSEC on the device
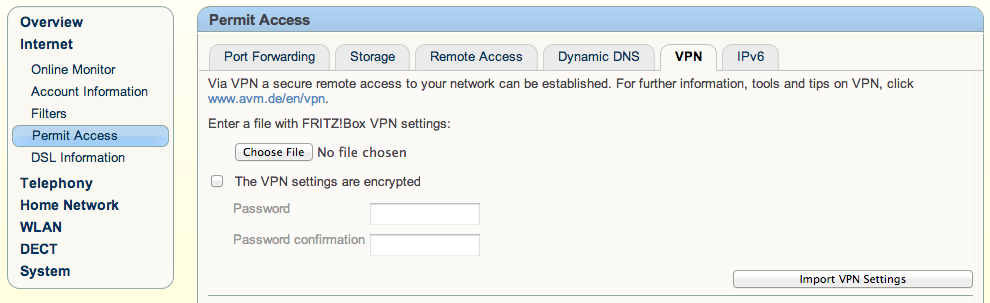
Save the file as a text file in TextEdit or similar, and upload it to your Router. This can be done by:
- Logging into the web interface on your router,
- Clicking “Internet” on the left
- Click “Permit Access” under the Internet heading
- Click the “VPN” tab
- Click “Choose File” and then select the file you saved
- Click the “Import VPN Settings” button.
Configuring your OSX machine
Open “Network” under system preferences. Click the little + icon down the bottom of the connection listing and you’ll be presented with something like this:
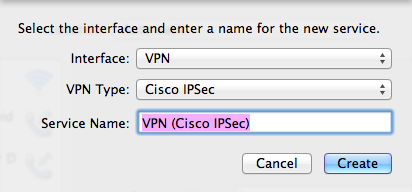
Select “VPN” as the Interface and “Cisco IPSec” as the VPN Type. Give it a descriptive name so you know what you’re connecting to in future.
This should be similar to what you’ll see:
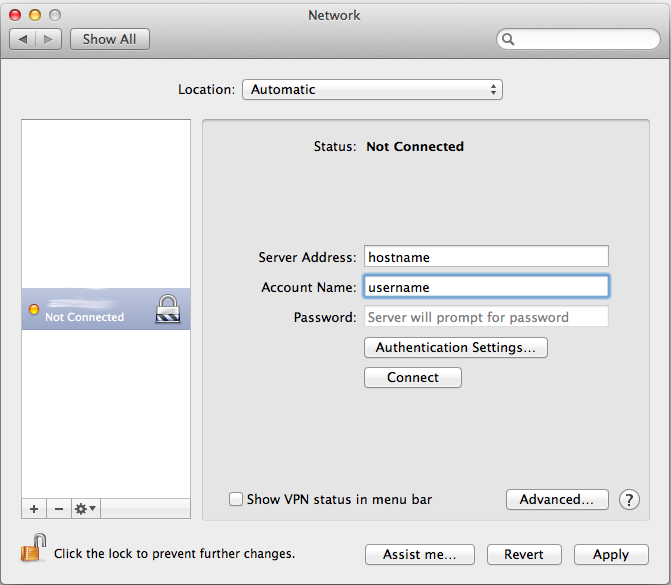
Enter your hostname (setup as dynamic DNS, I hope!) and the account name you setup in the configuration file above (AAA). If you want to store the password, enter the (BBB) details you put in above.
Click “Authentication Settings…”
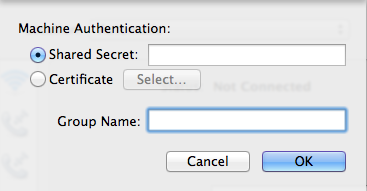
Enter the shared secret key (ZZZZZZ) and group name (YYYYYY) that you set in the configuration file.
Click Ok, then apply in the networks screen.
Click connect under “Authentication Settings…” and you should be able to connect.